As a veterinary technician with over a decade of experience in busy animal hospitals, I’ve seen firsthand how seemingly small grooming oversights can spiral into serious, painful, and expensive medical emergencies. While a stylish haircut is nice, true grooming is about proactive healthcare. It’s one of the most powerful tools you have to keep your pet healthy and comfortable, and it can literally save you thousands of dollars in vet bills.
Many owners think of grooming as an occasional cosmetic task, but I want you to start thinking of it as a regular health check-up you perform at home. By incorporating these habits into your routine, you’re not just keeping your pet clean—you’re practicing preventative medicine. These are some of the best grooming tips that empower you to spot trouble early and prevent common problems before they start. Let’s dive into the essential practices that will strengthen your bond with your pet and protect both their health and your wallet.
-
Tip #1: Master the Nail Trim (and Do It Often)
The Point: Consistently trimming your pet’s nails every 2-4 weeks is non-negotiable for their long-term health and comfort.
The ‘Why’: This is one of the most overlooked and impactful grooming tasks. When a dog’s or cat’s nails grow too long, they change the way the foot meets the ground. This forces their toes into an unnatural position, putting painful pressure on the joints and altering their entire posture and gait. Over time, this can contribute to arthritis and joint damage. Long nails are also prone to getting snagged and torn off—an incredibly painful injury that bleeds profusely and almost always requires a vet visit for pain control, bandaging, and antibiotics. In the worst cases, nails can curl around and grow directly into the paw pad, causing severe pain and infection that requires minor surgery to resolve.
The ‘How’ to Do It Right:
1. Choose Your Tool: You can use either traditional scissor-style or guillotine-style clippers, or a pet nail grinder (like a Dremel). Grinders are fantastic for smoothing edges and are less likely to pinch the nail, but some pets are scared of the noise.
2. Locate the Quick: The “quick” is the blood vessel and nerve that runs into the nail. On light-colored nails, it’s the visible pink part. On dark nails, it’s impossible to see. The trick for dark nails is to trim off very small slivers at a time. As you get closer to the quick, you’ll see a small, dark circle appear in the center of the cut nail surface. That’s your signal to stop.
3. Be Prepared: Always have styptic powder (like Kwik Stop) on hand. If you accidentally trim the quick, don’t panic. Just press a generous pinch of the powder firmly onto the nail tip for 30-60 seconds. It will stop the bleeding.
4. Make It Positive: Start slow. Touch your pet’s paws often without trimming. Then, trim just one nail and give a high-value treat. Work your way up to doing all four paws over several sessions. Consistency is more important than getting them all done at once. -
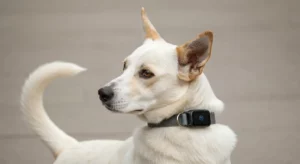
Tip #2: Perform Weekly Ear Checks and Cleanings
The Point: Inspecting and cleaning your pet’s ears weekly can prevent the vast majority of painful and stubborn ear infections.
The ‘Why’: Ear infections (otitis) are one of the most frequent reasons pets visit the vet. For dogs with floppy ears, swimmers, or those with allergies, the warm, dark, moist ear canal is a perfect breeding ground for yeast and bacteria. An infection can cause intense pain, itching, and discomfort. Pets will often shake their heads violently, which can lead to a secondary, and very expensive, problem: an aural hematoma (a blood vessel bursting in the ear flap), which often requires surgery. Regular cleaning removes excess wax and debris, maintains a healthy pH in the ear canal, and allows you to spot the early signs of infection (redness, odor, excessive discharge) before it becomes a full-blown crisis.
The ‘How’ to Do It Right:
1. Get the Right Supplies: Use a veterinarian-approved ear cleaning solution only. Never use water, hydrogen peroxide, or alcohol, as these can irritate the ear canal and make things worse. You will also need cotton balls or soft gauze squares—never use Q-tips, which can push debris deeper and risk rupturing the eardrum.
2. The Technique: Gently hold your pet’s ear flap up to open the canal. Fill the canal with the cleaning solution until it is visibly full. Don’t worry, they will shake the excess out.
3. Massage and Wipe: Massage the base of the ear for about 30 seconds. You should hear a squishing sound, which means the solution is breaking up debris inside. After massaging, step back and let your pet shake their head (it’s best to do this in a bathroom or outdoors!). Finally, take your cotton ball or gauze and gently wipe away all the debris and excess cleaner from the parts of the ear you can easily see. Do not go digging deep into the canal.
4. Know the Red Flags: If you notice a foul odor, coffee-ground-like debris (a sign of ear mites), yellow/green discharge, or if the ear is red, swollen, or painful to the touch, stop cleaning and schedule a vet visit. You may be dealing with an infection that requires medication. -
Tip #3: Commit to Brushing Their Teeth
The Point: Brushing your pet’s teeth 3-5 times a week is the gold standard for preventing dental disease, which affects more than just the mouth.
The ‘Why’: Up to 85% of pets over the age of three have some form of periodontal disease. This isn’t just a cosmetic issue of bad breath; it’s a serious medical condition. Plaque hardens into tartar, which pushes under the gumline, causing gingivitis (inflammation), pain, and tooth loss. The bacteria from the mouth can then enter the bloodstream and travel to vital organs, causing damage to the heart, kidneys, and liver. A professional dental cleaning at the vet requires general anesthesia and can cost anywhere from $500 to several thousand dollars if extractions are needed. Brushing at home is the single most effective way to prevent this entire painful and costly process.
The ‘How’ to Do It Right:
1. Use Pet-Specific Products: Never use human toothpaste. It contains ingredients like fluoride and xylitol that are toxic to pets. Purchase an enzymatic toothpaste for dogs or cats, which continues working even after you’re done brushing. You can use a pet toothbrush, a soft-bristled children’s brush, or a finger brush that fits over your fingertip.
2. Introduce It Slowly: Start by letting your pet lick the toothpaste off your finger for a few days. Then, introduce the brush by letting them lick the paste off of it. Next, gently lift their lip and brush just one or two of the front canine teeth for a few seconds, followed by a reward. Gradually increase the number of teeth you brush over many sessions.
3. Focus on the Outside: You only need to focus on the outer surfaces of the teeth (the cheek side), as the tongue does a decent job of keeping the inner surfaces cleaner. Use a gentle, circular motion, paying special attention to the gumline.
4. Don’t Give Up: Even brushing a few times a week is far better than nothing. If your pet absolutely refuses, talk to your vet about other effective options like VOHC-approved dental diets, water additives, and dental chews. They aren’t a replacement for brushing, but they are one of the best grooming tips for supplementary care. -
Tip #4: Brush Their Coat to Prevent Matting
The Point: Regular, thorough brushing—especially for long-haired pets—is not about aesthetics; it’s about preventing extreme pain and skin damage from mats.
The ‘Why’: A mat is more than just a tangle. It’s a dense, tight knot of fur that pulls constantly on the skin. Severe matting, often called “pelting,” is intensely painful. It restricts blood flow, traps moisture and bacteria against the skin, and can hide nasty surprises like fleas, ticks, maggots, and raging skin infections. I have had to sedate pets to shave off pelted coats that were so tight they had caused open sores and hematomas underneath. This is a medical procedure, not a cosmetic one, and it’s 100% preventable with routine brushing.
The ‘How’ to Do It Right:
1. Get the Right Tools: Your brush choice depends on your pet’s coat. A slicker brush is great for general use on many coat types. An undercoat rake is essential for double-coated breeds (like Huskies or Golden Retrievers) to remove dead, loose fur. A metal “greyhound” comb is the final check; if you can’t get the comb through the fur from root to tip, it’s not fully brushed out.
2. The Technique Matters: Don’t just skim the top layer of fur. Use the “line brushing” method: hold up a section of hair and brush the hair underneath it, working in small sections from the skin outwards. Pay close attention to high-friction areas where mats form first: behind the ears, in the armpits, under the collar, and on the belly and rear end.
3. Tackle Tangles Early: If you find a small knot, try to gently work it apart with your fingers first. You can use a detangling spray to help. If you must use a comb or slicker brush, hold the base of the hair near the skin to prevent painful pulling. If a mat is already tight against the skin, do not try to cut it out with scissors. It is incredibly easy to cut the skin, which is often pulled up into the mat. A tight mat must be addressed by a professional groomer or veterinarian with clippers. -
Tip #5: Monitor the Rear End for Anal Gland Issues
The Point: Knowing the signs of anal gland problems can help you intervene before they become impacted or abscessed.
The ‘Why’: All dogs and cats have two small sacs just inside their anus, called anal glands. They normally empty a foul-smelling fluid during defecation. However, for many pets (especially small breeds), they don’t empty properly. This leads to impaction, where the fluid becomes thick and uncomfortable. The pet will often “scoot” their bottom on the floor or lick the area excessively. If left untreated, the impacted gland can become infected and develop into a painful abscess, which can rupture through the skin. This is an emergency that requires anesthesia, lancing, flushing, and a course of antibiotics and pain medication.
The ‘How’ to Monitor:
1. Watch for the Signs: The most common sign is scooting. Other signs include a sudden and intense licking of the rear end, a foul or fishy odor, difficulty or pain when pooping, or reluctance to sit down.
2. Know When to Get Help: While some owners and groomers learn to express the glands externally, the key tip here is *monitoring*. At the first sign of discomfort, schedule an appointment with your vet or a knowledgeable groomer. They can express the glands safely and check if there’s an underlying infection.
3. Consider Dietary Fiber: Sometimes, adding more fiber to your pet’s diet (like a spoonful of plain canned pumpkin or a psyllium husk supplement) can help firm up the stool, which helps the glands express naturally. Always consult your vet before making significant dietary changes. -
Tip #6: Inspect Paws and Trim Foot Fur
The Point: A quick paw check during grooming can prevent lameness and infections from foreign objects or overgrown fur.
The ‘Why’: Your pet’s paws take a beating every day. All sorts of things can get stuck in them: glass shards, thorns, burrs, pebbles, and in some regions, dangerous grass seeds like foxtails, which can burrow into the skin and migrate through the body. The fur between the paw pads can also become matted with mud, debris, or even ice balls in the winter, causing painful sores. For indoor pets, long fur between the pads can reduce traction on smooth floors, leading to slips and falls, which is especially dangerous for senior pets.
The ‘How’ to Do It Right:
1. Perform a Thorough Inspection: During every grooming session, take a moment to look at each paw. Spread the toes and check the pads for any cuts, cracks, or swelling. Look carefully in between the toes and pads for any foreign objects.
2. Trim Excess Fur Safely: For pets with furry feet, use a pair of blunt-nosed or safety-tipped scissors to carefully trim the hair so that it is level with the paw pads. Never point the scissors toward the pad. You can also use a small, quiet pair of clippers with a guarded blade for a safer and more effective trim.
3. Moisturize if Needed: If you live in a dry climate or notice your pet’s pads are cracked, a thin layer of a pet-safe paw balm or wax can help protect and moisturize them. This is especially useful before walks on hot pavement or icy, salted sidewalks. -
Tip #7: Use Grooming Time for a Full-Body Lump Check
The Point: Turn every brushing session into an opportunity to perform a skin and body check to find lumps, bumps, and parasites early.
The ‘Why’: The earlier you find a problem, the better the outcome. This is especially true for things like ticks, which can transmit diseases, and new growths. While many lumps and bumps are benign fatty tumors (lipomas), some can be malignant cancers like mast cell tumors. Finding a cancerous growth when it is small and has not spread can be the difference between a simple, curative surgery and a complex, life-threatening illness. Running your hands over your pet’s body regularly helps you establish a baseline of what’s normal, so you can immediately recognize when something is new or has changed.
The ‘How’ to Do It Right:
1. Be Systematic: As you brush or bathe your pet, make a conscious effort to feel their entire body with your fingertips. Start at the head and work your way back. Don’t forget the neck (especially under the collar), armpits, belly, groin, and down each leg to the toes.
2. Know What You’re Feeling For: You’re looking for anything new: bumps, scabs, rashes, flaky skin, areas of hair loss, or parasites like fleas and ticks.
3. Map and Monitor: If you find a small lump, don’t panic. Note its location, approximate size (e.g., “pea-sized,” “grape-sized”), and texture (soft, hard, movable, fixed to the skin). You can even draw a little “lump map” of your pet. At your next vet visit, point it out. Your vet can perform a quick and often inexpensive test called a fine-needle aspirate to determine what it is. If you notice a lump that is growing rapidly, changing color, or seems to be bothering your pet, schedule a vet appointment immediately. -
Tip #8: Gently Clean Around the Eyes
The Point: Wiping away eye discharge daily prevents skin staining, irritation, and potential eye infections.
The ‘Why’: Most pets have a small amount of clear or reddish-brown discharge (“eye boogers”) that collects in the corner of their eyes, which is normal. However, if this discharge is allowed to build up, it keeps the skin and fur around the eyes constantly moist. This can lead to skin irritation, foul odors, and even bacterial or yeast infections on the skin. For flat-faced (brachycephalic) breeds like Pugs and Persians, whose eyes are more exposed, keeping this area clean is critical to prevent debris from causing painful corneal ulcers.
The ‘How’ to Do It Right:
1. Use Safe Materials: A soft, lint-free cloth or a cotton ball dampened with warm water is usually all you need. You can also use a commercial, sterile eyewash solution made for pets. Never use your fingers, dry cotton, or products not intended for use around the eyes.
2. Wipe Gently Away from the Eye: Gently wipe the debris from the corner of the eye outwards and down, away from the eyeball itself. Use a fresh part of the cloth for each eye to avoid transferring any potential infection.
3. Know When It’s Not Normal: Normal discharge is typically clear or slightly rusty-colored. If you see thick, yellow, or green discharge, or if the whites of the eyes (sclera) are red, or if your pet is squinting, holding the eye closed, or pawing at their face, it’s a sign of a problem like conjunctivitis, an ulcer, or dry eye. These conditions require veterinary diagnosis and treatment. -
Tip #9: Maintain a “Sanitary Trim”
The Point: Keeping the fur around your pet’s genital and anal areas trimmed short is crucial for hygiene and preventing serious infections.
The ‘Why’: For pets with long or thick fur, this is a critical hygiene task. When fur around the rear end is too long, it can easily become soiled with feces and urine. This is not only messy and smelly, but it creates a dangerous health risk. The matted, soiled fur traps moisture and bacteria against the skin, leading to painful skin infections (urine scald and fecal contamination). Even worse, in warm weather, this area becomes a prime target for flies to lay eggs, resulting in flystrike—a horrifying and life-threatening condition where maggots hatch and eat away at the living flesh. A simple trim prevents all of this.
The ‘How’ to Do It Right:
1. Safety First: This is a very sensitive area. The safest tool for an at-home trim is a small, quiet pair of clippers (often sold as “paw trimmers”) with a guard. This prevents you from accidentally cutting the skin.
2. Use Scissors with Extreme Caution: If you must use scissors, they should only be blunt-nosed or safety-tipped scissors. Always ensure the points of the scissors are facing away from your pet’s body, and always keep a comb between the blade and your pet’s skin to act as a barrier.
3. When in Doubt, See a Pro: If you are not confident or if your pet is nervous, do not risk an injury. This is a standard and quick procedure for any professional groomer. The cost of a sanitary trim is minuscule compared to the vet bill for treating a severe skin infection or flystrike. It’s one of the best grooming tips to simply outsource if you’re uncomfortable.
By integrating these nine expert tips into your pet care routine, you are taking an active role in their health. You are their first line of defense against pain and illness. Grooming is more than just a chore—it’s a dialogue, a health check, and an act of love that will keep your companion happy, healthy, and by your side for years to come.